
Molten Voltage
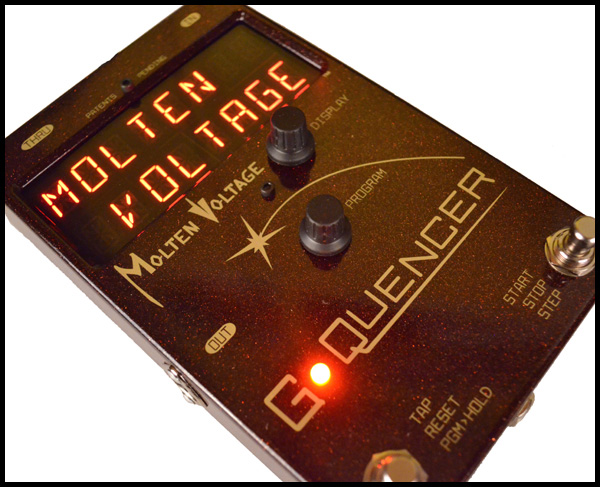
G-Quencer by Molten Voltage transforms the DigiTech Whammy pedal into a Pitch-Shifting Sequencer
TABLE OF CONTENTS
Initial Setup
Selecting Whammy Type
Changing your Whammy MIDI Channel
Connections
Power Jack
OUT Jack
IN Jack
THRU Jack
Side Controller Jack
Controls
DISPLAY Knob
PROGRAM Knob
TAP Button
START Button
Visual Indicators
Display
Full-Color LED
How to Use G-Quencer
Sequences
Factory Presets
Selecting Presets Using G-Quencer
Selecting Presets Using MIDI
Modes of Operation
2-Step™
1-Step
Different Whammy Settings
Tap Tempo
One-Shot
MIDI Clock
MIDI Control Change
Synth Keys
Creating and Editing Presets
Initial Settings
Programming Whammy Settings
Programming Sequence Intervals
TAP AND ONE SHOT
OLD TEMPO
MIDI CLOCK
Saving Presets
Programming Tips and Videos
Naming Presets
Suggested Preset Name Format
Preset Naming Utility for Windows
Globals
MIDI RCV.CH.
WHAMMY CHAN.
WHAMMY VER.
TAP AUTO PLAY
LOOP .OFF
CC STEP VAL.
PRESET MIN.
PRESET MAX.
EXT. TAP ADJ.
CUE LOOP
DUMP PGM
Storing Presets Externally
MIDI-OX Instructions (Windows)
SysEx Librarian Instructions (Mac)
Loading External Presets
Loading From Another G-Quencer
MIDI-OX Instructions (Windows)
SysEx Librarian Instructions (Mac)
Table of Displayed Whammy Settings
Whammy 4
Whammy 5 & DT
Bass Whammy
Table of Displayed Pitch Shift and Harmony Intervals
Specifications
Power Requirements
MIDI Phantom Power
MIDI Running Status
G-Quencer Dimensions
GQ Side Controller Dimensions
Description
G-Quencer takes the DigiTech Whammy, the most popular pitch-shifting pedal of all time, and multiplies its sonic potential. G-Quencer lets you hear notes that aren’t normally available on the Whammy, then sequence those notes into elegant harmonies and improbable riffs. GQ transforms the DigiTech Whammy into an irresistible Riff Dispenser.
With this powerful new controller and patent-pending technology, you can do anything from ripping Van Halen licks while playing a single note, to creating transcendental embryonic mindholes. But don't mistake GQ for a noise machine, it’s a serious compositional tool, providing complementary counterpoint to melodic lines.
Initial Setup
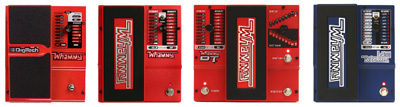
G-Quencer works with all 4 modern DigiTech Whammy pedals: Whammy 4, Whammy 5, Whammy DT, and the new Bass Whammy.
Note: the Whammy 4 switches between intervals more abruptly than the other 3 versions, and has a more "techno" sound
Selecting Whammy Type
When powering on a new G-Quencer for the first time, the correct Whammy type must be selected so the right 32 factory presets are loaded.
Note: Whammy type can be changed later as described below
The Display will initially say WHAMMY VER. BASS. Turn the PROGRAM Knob to select your Whammy type, then press and release the START Button.
Here's a video that shows how:
Initial Whammy Selection
Changing your Whammy MIDI Channel
G-Quencer's default MIDI Channel is 2.
Note: G-Quencer's Whammy Channel can be changed as described below
Your Whammy MUST be set to the same MIDI Channel as G-Quencer (OMNI will not work). Here's how to set your Whammy to Channel 2:
1. Disconnect the power from the Whammy pedal - turn off your amp first!
2. Press and hold the Whammy footswitch while reconnecting the power.
3. One of the Whammy LEDs will flash, indicating the currently selected MIDI channel.
4. Rotate the knob to select MIDI channel 2:
Whammy 4 = DEEP
Whammy 5, Whammy DT, and Bass Whammy = OCTAVE UP
5. Press the Whammy footswitch again to exit.
Note: if you want to use a different MIDI Channel, review your Whammy's manual
Connections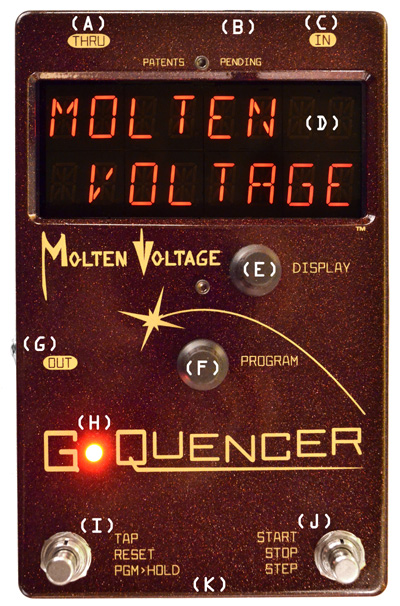
Power Jack (B)
Plug in a separate or isolated 9 volt, 2.1mm, 300mA minimum, tip negative ("BOSS" style) DC Power supply into the DC Power Jack. Never power G-Quencer using a "daisy chained" power supply that is also connected to audio effects.
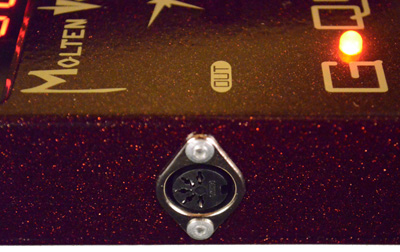
OUT Jack (G)
Connect a standard 5-pin MIDI cable from G-Quencer's OUT Jack to the MIDI jack on your Whammy.
IN Jack (C)
G-Quencer works by itself and does not require an external MIDI controller. If you want to control GQ with an external MIDI controller, connect a standard 5-pin MIDI cable from the device sending MIDI data to GQ's IN Jack.
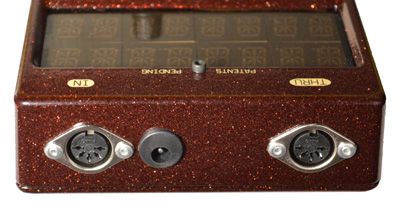
THRU Jack (A)
The THRU jack repeats all MIDI messages received at the IN Jack, allowing another MIDI device to be daisy-chained to G-Quencer. Connect a standard 5-pin MIDI cable from the THRU Jack to the MIDI IN Jack on your compatible device.
Note: information sent to the Whammy via GQ's OUT Jack is not repeated at the THRU Jack
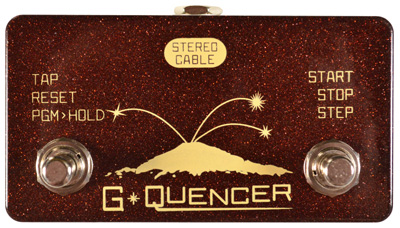
Side Controller Jack (K)
Molten Voltage offers an optional Side Controller that connects to the front end of G-Quencer with a 1/4" stereo cable (included). The Side Controller remotely operates GQ's TAP Button and START Button.
Note: GQ's buttons still work normally with the Side Controller connected
The idea is to leave G-Quencer on your pedalboard and have the Side Controller off your board in a more convenient position. The Side Controller is passive (does not require any power).
Controls
DISPLAY Knob (E)
Tapping the DISPLAY Knob will show you the current preset number.
Holding the DISPLAY Knob causes G-Quencer to enter Preset Naming Mode, where you create custom names for your presets.
PROGRAM Knob (F)
Holding the PROGRAM Knob allows you to enter two different modes. When you first press, the display will say *HOLD TO EDIT*. Continue to hold and the Display will say RELEASE TO COPY. If you release, then you will enter Preset Copy Mode. If you keep holding, the Display says EDIT MODE ON. When you release, G-Quencer will enter Preset Edit Mode.
Turning the PROGRAM Knob serves different functions depending on whether you are selecting presets, copying presets, editing presets, or editing Globals.
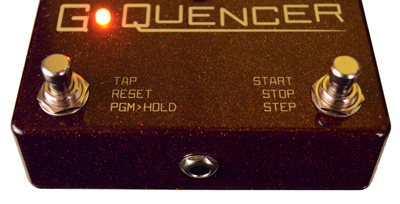
TAP Button (I)
The TAP Button is labeled TAP, RESET, PGM>HOLD.
The TAP Button performs different functions depending on whether you are selecting presets, using 2-Step sequences, 1-Step sequences, Different Whammy Settings sequences, Tap Tempo sequences, One-Shot sequences, editing presets, or editing Globals.
START Button (J)
The START Button is labeled START, STOP, STEP.
The START Button performs different functions, depending on whether you are selecting presets, using 2-Step sequences, 1-Step sequences, Different Whammy Settings sequences, Tap Tempo sequences, One-Shot sequences, editing presets, or editing Globals.
Visual Indicators
Display (D)
G-Quencer features a bright, 16-character alphanumeric LED Display.
The Display is used to indicate presets names, sequence intervals, and to show information while copying presets, creating presets, loading external presets, and editing Globals.
Full-Color LED (H)
G-Quencer's full-color LED glows differently depending on what is happening.
| LED Color | Flashing | Solid |
| Off | The LED is Off for the last half of the quarter-note beat when using Tap Tempo and One-Shot presets that are not "old tempo", as well as MIDI Clock presets |
A Tap Tempo preset is stopped in Preset Edit Mode |
| White | A Tap Tempo, One-Shot, or MIDI Clock preset has been cued up, but is not yet playing |
|
| Purple | A Tap Tempo, One-Shot, or MIDI Clock preset is running in Preset Edit Mode |
A MIDI Clock preset is stopped in Preset Edit Mode, or you are editing a 2-Step, 1-Step, or Different Whammy Settings of preset, or you are in Globals Mode |
| Blue | A MIDI Clock preset is running, and clock is being received |
A MIDI Clock preset is loaded, but clock is not being received, or the preset is stopped |
| Green | A 2-Step, 1-Step, or Different Whammy Settings type preset is loaded |
|
| Yellow | ||
| Red | The LED is Red for the last half of the quarter-note beat when using Tap Tempo and One-Shot presets that use an "old" tempo |
Note: the LED always flashes in time with a quarter note, regardless of the number of steps or measures in the sequence
How to Use G-Quencer
Sequences
When using the expression pedal, Whammy normally moves between 2 different pitch shift or harmony intervals, such as Unison and 2 Octave Up pitch shift, or Octave Down and Octave Up harmony.
G-Quencer accesses every available pitch shift and harmony interval, even those not normally available on the Whammy, then lets you arrange those pitch and harmony intervals into sequences of up to 16 steps. You cycle through those sequence steps using one of G-Quencer's Modes of Operation.
Factory Presets
G-Quencer has 32 pre-installed presets. This document describes them. You can edit the factory presets or copy them to other locations. You can also restore the factory presets.
Selecting Presets Using G-Quencer
When using G-Quencer as a stand-alone pedal, presets are selected by holding down the TAP Button until the display says SELECT PRESET. Release the TAP Button, then use the START Button to cycle through the presets. Tapping the START Button advances to the next preset, and the preset name flashes. When the START Button is held longer than 2 seconds, the preset select cycle reverses direction.
Note: when the selected preset is the same as the current preset, the preset name stops flashing.
A new G-Quencer cycles through the first 32 presets.
Note: the range of selectable presets can be changed using the PRESET MIN. and PRESET MAX. Globals
Once in Preset Select Mode, any of the 128 presets can be selected by turning the PROGRAM Knob.
Pressing the TAP Button loads the currently selected preset.
Note: if a Tap Tempo, MIDI Clock, or One-Shot type preset is currently playing, and you select another one of those types of presets, the G-Quencer default is for the current sequence to finish playing before the new sequence begins, which allows perfectly smooth transitions. The Cue Loop Global controls this behavior. The sequence does not finish playing when you switch to a 2-Step, 1-Step, or Different Whammy Settings preset.
Selecting Presets Using MIDI
When using G-Quencer with an external MIDI controller, presets are selected by sending MIDI Program Change messages on the MIDI Receive Channel. Connect the MIDI Out of the MIDI controller to the IN Jack on G-Quencer.
Note: if a Tap Tempo, MIDI Clock, or One-Shot type preset is currently playing, and you select another one of those types of presets, the G-Quencer default is for the current sequence to finish playing before the new sequence begins, which allows perfectly smooth transitions. The Cue Loop Global controls this behavior. The sequence does not finish playing when you switch to a 2-Step, 1-Step, or Different Whammy Settings preset.
Modes of Operation
There are 8 different G-Quencer Modes of Operation.
In 2-Step™, 1-Step, and Different Whammy Settings modes, sequences are manually advanced using the START Button.
In Tap Tempo, One-Shot, and MIDI Clock modes, G-Quencer automatically cycles through the sequence.
Note: the Cue Loop and Tap Auto Play Globals determine whether new sequences wait for the previous one to finish, and whether Tap Tempo or One-Shot presets sequence start automatically when selected.
In MIDI Control Change and Synth Keys modes, an external MIDI controller is used to control G-Quencer.
2-Step™
In 2-Step™ mode, you step through the sequence using the START Button, but instead of advancing once each time the button is pressed, G-Quencer moves one step when you press down, and another when you release. When the end of the sequence is reached, it starts over at the beginning.
Note: the key to using 2-Step mode is to hold down the START Button long enough to hear each step
This is G-Quencer's biggest innovation, and a much more natural and intuitive way to play along with a live band and shifting tempo. You control the speed of the sequence rather than it controlling you.
2-Step™ Mode In Action
During 2-Step Mode, the Display initally shows the preset name. Once the START Button is pressed, the Display shows the step number and current pitch shift or harmony interval.
Pressing the TAP Button resets the sequence to the first step.
1-Step
In 1-Step mode, you step through the sequence using the START Button. G-Quencer advances one step each time you press. When the end of the sequence is reached, it starts over at the beginning.
During 1-Step Mode, the Display initally shows the preset name. Once the START Button is pressed, the Display shows the step number and current pitch shift or harmony interval.
Pressing the TAP Button resets the sequence to the first step.
Tip: 1-Step mode is particularly useful for modulating (changing keys) during solos
Different Whammy Settings
In Different Whammy Settings mode, you step through a sequence of Whammy Settings (rather than pitch and harmony intervals) using the START Button. G-Quencer advances one step each time you press. When the end of the sequence is reached, it starts over at the beginning.
Note: you can also choose whether the Whammy will be On or Bypassed at each step, as described below
Pressing the TAP Button resets the sequence to the first step.
No more bending over on stage like a Knob Goblin!
Tap Tempo
In Tap Tempo mode, G-Quencer continually loops through the sequence.
Tap Tempo sequences are started and stopped using the START Button.
Note: Tap Tempo sequences start automatically when the Tap Auto Play Global is set to YES
During Tap Tempo mode, the Display shows the preset name, while the LED flashes in time with the quarter-note tap interval.
Change the tempo by tapping the TAP Button at least 2 times. The quarter-note tap interval will be the time between the last 2 taps. You can tap in a new tempo whether or not a sequence is playing.
Note: the maximum quarter-note tap interval is
24 bpm (2.5 seconds), while the minimum is approximately 300 bpm
One-Shot
In One-Shot mode, G-Quencer runs through the sequence once.
One-Shot Mode In Action
One-Shot sequences are started using the START Button.
Note: One-Shot sequences start automatically when the Tap Auto Play Global is set to YES
Pressing the START Button while a One-Shot sequence is playing "stacks" more One-Shots. In other words, if you press the START Button 3 times quickly, G-Quencer will play back the One-Shot sequence 3 times in a row.
During One-Shot mode, the Display shows the preset name, while the LED flashes in time with the quarter-note tap interval.
Change the tempo by quickly pressing the TAP Button at least 2 times. The quarter-note tap interval will be the time between the last 2 taps. You can tap in a new tempo whether or not a sequence is playing.
Note: the maximum quarter-note tap interval is
24 bpm (2.5 seconds), while the minimum is approximately 300 bpm
Tip: One-Shot presets are great for "laser" effects. You can also add riffs to your songs by triggering slower One-Shot sequences at regular intervals.
MIDI Clock
MIDI Clock is a powerful tool to remotely control G-Quencer's timing and synchronize sequences with over 100 other guitar effects, as well as drum machines, synthesizer sequencers, DAW's, recording software, lighting rigs, and more.
In MIDI Clock mode, G-Quencer continually loops through the sequence in time with the incoming MIDI Clock. If there is no incoming clock, the sequence does not advance.
Note: the maximum allowable MIDI Clock speed is approximately 500 bpm
Change the tempo by adjusting the MIDI Clock speed.
When selected, MIDI Clock sequences start automatically if MIDI Clock is present.
Manually start and stop MIDI Clock sequences by pressing the START Button or by sending a MIDI Start or Stop command. These actions will always reset the MIDI Clock sequence to the first step.
Note:
G-Quencer also responds to MIDI Continue commands, which will cause the sequence to start playing from its last position.
When a MIDI Stop command is received, or you manually stop a MIDI Clock preset with the START Button, G-Quencer stops the sequence and jumps
to the LOOP OFF Setting.
Note: the LOOP OFF Setting can be set to sequence step one, as described below
During MIDI Clock mode, the Display shows the preset name, while the LED flashes in time with the quarter-note clock interval.
Over 100 other MIDI-enabled effects can sync to G-Quencer using MIDI Clock, opening up worlds of possibilities.
MIDI Control Change
Use a device that sends MIDI Control Change [CC] messages to slide through your 1-Step or Different Whammy Settings sequences. Select the MIDI Controller number using the CC Step Value Global.
When G-Quencer receives the initial CC value on the MIDI Receive Channel, it advances the sequence one step.
If the same CC value is received, then the sequence advances another step, and will start over at step one when it reaches the end.
If a higher CC value is received, then the sequence advances another step, and stops when it reaches the end.
If a lower CC value is received, the sequence moves one step backward, stopping at step one.
Tip: a MIDI Sustain Pedal (CC 64) that alternately sends values 127 and 0 on press and release, will make GQ toggle between 2 steps
Tip: consider limiting the range of your MIDI expression pedal for best results
Tip: create custom expression control curves by selecting non-linear sequence intervals
Synth Keys
G-Quencer lets you control the Whammy with a MIDI keyboard. Send GQ MIDI Note On messages on the MIDI Receive Channel.
Middle C is Unison. Playing the two octaves on either side of Middle C will cause the Whammy to pitch shift to the corresponding interval.
Note: Synth Keys mode works whether or not a looping sequence is playing, allowing you to manually accent your riffs
Creating and Editing Presets
Creating your own G-Quencer presets is easy and fun. Editing existing presets is also simple.
Creating Presets in 2-Step™ Mode
Initial Settings
Select the preset you want to create or edit.
Press and hold the PROGRAM Knob and the Display will say *HOLD TO EDIT*. Continue to hold and the Display will say RELEASE TO COPY. If you stop pressing at this point, you will enter Preset Copy mode. Continue holding until the Display says EDIT MODE ON, then release the PROGRAM Knob.
G-Quencer will ask how many steps you want to use by displaying SEQUENCE STEPS .##. Turn the PROGRAM Knob to select the number of steps you want, then tap the knob.
Note: MIDI Clock sequences can only contain 1, 2, 3, 4, 6, 8, 12, or 16 steps. All other sequences can contain 1-16 steps.
G-Quencer will ask what type of preset you want to create by displaying SEQ.MODE, as well as one of the following Modes of Operation:
2-STEP * .:. 1-STEP * .:. T.TEMPO* .:. MIDICLK* .:. SETTING* .:. 1-SHOT *
Turn the PROGRAM Knob to select the type of preset, then tap the knob.
Note: changing to or from a Different Whammy Settings preset resets all sequence values. This does not happen until you tap the knob to advance to the next screen.
If you select Tap Tempo, MIDI Clock, or One-Shot, G-Quencer will ask how many measures are in the sequence by displaying MEASURES PER ∞ ##. Turn the PROGRAM Knob to select the number of measures you want [1-8], then tap the knob. Each measure lasts 1 quarter note, which also equals the time between taps.
You next program the sequence steps. Unless you chose Different Whammy Settings you will program Whammy pitch and harmony intervals.
Programming Whammy Settings
If you choose a Different Whammy Settings preset, you will select the Whammy setting for each step based on the Table of Displayed Whammy Settings. G-Quencer will display STEP ## to indicate the current step. Turn the PROGRAM Knob to select the setting, then tap the knob to advance to the next step.
Note: Whammy's expression pedal gets "virtually" set to the Toe Up, Heel Down position for all settings except Shallow and Deep detune, which get "virtually" set to the Toe Down, Heel Up postion.
Programming Sequence Intervals
For all preset types except Different Whammy Settings, G-Quencer will first ask whether you want to use a pitch shift or harmony interval for the current step by displaying STEP ##, and either PITCH * or HARMONY*. Turn the PROGRAM Knob to make your selection, then tap the knob to advance to the next screen.
Note: when you swtich from harmony to pitch (or pitch to harmony) and move on to the next step, the interval is reset to UNISON
G-Quencer then asks what interval you want to use by displaying STEP ##.P for pitch shift intervals, or STEP ##.H for harmony intervals, as well as the currently selected interval. Turning the PROGRAM Knob cycles chromatically through the available intervals. The Table of Displayed Pitch and Harmony Intervals lists the available intervals.
Note: the selected interval is sent to the Whammy in real-time so you can hear how it sounds
If you are programming a Tap Tempo sequence, you can start and stop the sequence with the START Button. Playing the looping sequence allows you to preview your changes in real-time.
If you are programming a One-Shot sequence, you can trigger the sequence with the START Button.
Tap in new a tempo with the TAP Button. The tapped tempo is stored as part of the preset.
If you prefer to have your Tap Tempo or One-Shot preset use the current G-Quencer tempo, rather than recall a stored tempo, press and hold the TAP Button while quickly pressing and releasing the START Button, then release the TAP Button.
Rather than turning off while flashing, the LED will alternately flash red, indicating an "old" tempo preset.
If you are programming a MIDI Clock sequence, and MIDI Clock is being received, you can preview the looping sequence and hear your changes in real-time.
Manually Start and Stop the loop by pressing the START Button.
Saving Presets
When you have programmed your sequence, press and hold the PROGRAM Knob until the Display says CHANGES *SAVED*, then release the knob.
Programming Tips and Videos
***Turn the PROGRAM Knob while holding it down to quickly shuffle through the Preset Edit screens***
No matter what preset type you use, you can switch over to Tap Tempo mode to preview sequence changes, then switch back to the desired mode before saving.
If you really mess up while creating a preset, cancel your changes by disconnecting G-Quencer's power.
Creating Presets in 2-Step™ Mode
Naming Presets
G-Quencer stores custom names of up to 16 characters for each of its 128 presets.
To change the current preset name, hold down the DISPLAY Knob until the display goes dark, then release and the first character will be blinking. Turn the DISPLAY Knob to select the character for that segment. Tap the DISPLAY Knob to advance to the next segment. Repeat until your message is complete, then hold down the DISPLAY Knob until the display goes dark. Release to exit Preset Naming Mode.
Suggested Preset Name Format
G-Quencer's factory-installed presets use a common format for the first line of their names:
format = PGM.[symbol][3-digit preset number]
The following symbols appear before the preset number to let you know the preset type:
| * | Tap Tempo .:. also at the start of names when using "old" tempo |
| > | One-Shot .:. also at the start of names when using "old" tempo |
| . | MIDI Clock |
| < | 2-Step |
| + | Different Whammy Settings |
| - | 1-Step |
Preset Naming Utility for Windows
Molten Voltage offers a basic Preset Naming Utility for Windows which generates MIDI SysEx data that can be loaded onto G-Quencer using MIDI-OX.
Download it here, and follow these instructions for Loading External Presets.
Copying Presets
Copying G-Quencer presets takes seconds.
Select the preset you where you want the copy made.
Press and hold the PROGRAM Knob. The Display will say *HOLD TO EDIT*. Continue to hold and the Display will say RELEASE TO COPY, then quickly release the PROGRAM Knob.
The Display will say COPY OFF TO [Current Preset Number]. Turn the PROGRAM Knob to select the number of the copy source. Press and hold the PROGRAM Knob until the display says CHANGES *SAVED*.
Note: if you set the copy source value to OFF or the current preset number, the Display will say COPY ABORTED
Tip: if you are uncertain of any preset number, tap the DISPLAY Knob and it will be shown
Globals
Use Globals Mode to change G-Quencer's default system settings and to back up presets.
Changing G-Quencer Default Settings In Globals Mode
Enter Globals Mode by holding down the TAP Button while powering on G-Quencer. The Display will say EDIT GLOBALS. Release the TAP Button and GQ will go to the first Global, which is MIDI Receive Channel.
Change the value of the Global by turning the PROGRAM Knob.
Advance to the next Global by quickly pressing the TAP Button.
Exit Globals Mode by holding down the TAP Button until the display says GLOBALS *SAVED*. When the button is released, G-Quencer will start normally.
MIDI RCV.CH.
G-Quencer does not require an external MIDI controller, but if you want to use one, select the MIDI Receive Channel that matches the MIDI Send Channel of your external controller.
Note: the MIDI Receive Channel must be different than the Whammy Channel, and G-Quencer will not allow you to select the same channel for both.
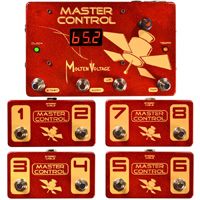
.G-Quencer works with any MIDI controller that sends MIDI Program Changes, including the Molten Voltage Master Control.
The Default MIDI Receive Channel is 15.
WHAMMY CHAN.
This is the MIDI Channel on which G-Quencer sends information to the Whammy. G-Quencer's Whammy Channel must match your Whammy's MIDI Channel. The default GQ Whammy Channel is 2, and you can set your Whammy to that channel as described above.
If you change G-Quencer's Whammy Channel, be certain that you also change your Whammy's MIDI Channel to the same value.
Note: the Whammy Channel must be different than the MIDI Receive Channel, and G-Quencer will not allow you to select the same channel for both.
WHAMMY VER.
When you get your new G-Quencer, you are asked to select the type of Whammy you are using, as described above. You can, however, change your Whammy type with this Global.
Note: IF YOU CHANGE YOUR WHAMMY VERSION, ALL PRESETS ARE PERMANENTLY ERASED!
After you have selected your new Whammy Version, press the TAP Button and the Display will say * ERASE ALL. NO. To change your Whammy Version and erase all your presets, turn the PROGRAM Knob until the display says * ERASE ALL. YES, then press the TAP Button.
If you do not say YES, then the change is aborted and G-Quencer switches back to your previous Whammy Version.
TAP AUTO PLAY
When switching to a Tap Tempo or One-Shot preset, you can choose whether the sequencer will start automatically or whether G-Quencer will wait until you press the START Button. The default setting is to have the sequence start immediately, displayed as TAP AUTO PLAY. YES. If you do not want the sequence to start automatically, switch to TAP AUTO PLAY. NO.
LOOP .OFF
When a Tap Tempo or MIDI Clock sequence is stopped, or when a One-Shot sequence ends, G-Quencer jumps to a particular Whammy setting. The default for all versions is Octave Up with the Whammy On, displayed as +OCT ++, and with the expression pedal "virtually" set to the toe up, heel down position.
You can change what setting the Whammy jumps to by turning the PROGRAM Knob and referring to the Table of Displayed Whammy Settings.
Note: consider using a setting with the Whammy On to save wear and tear on the Whammy's internal true-bypass relay.
You can instead have the Whammy jump to the first step in the current sequence
by tapping the START Button. The Display will say STEP
ONE.
Note: turning the PROGRAM Knob switches
back to the Whammy settings
CC STEP VAL.
It is possible to use MIDI Control Change messages to move through G-Quencer sequences, as described above. This Global sets the MIDI controller number that causes GQ to move through a sequence. The default controller number is 11, which normally corresponds to an Expression Controller.
PRESET MIN.
When selecting presets using G-Quencer buttons, GQ cycles through a range of preset numbers. This Global sets the lower limit of that range. The default Preset Minimum is 1.
Note: the Preset Minimum can never be higher than the Preset Maximum
PRESET MAX.
When selecting presets using G-Quencer buttons, GQ cycles through a range of preset numbers. This Global sets the upper limit of that range. The default Preset Maximum is 32. The higest available value is 128.
Note: the Preset Maximum can never be lower than the Preset Minimum
EXT. TAP ADJ.
This Global determines how long an external TAP Button is debounced. Do not adjust this value. The default External Tap Adjust value is 100.
CUE LOOP
If a Tap Tempo or MIDI Clock type preset is currently playing, and you select another one of those types of presets or a One-Shot, the G-Quencer default is for the old sequence to finish playing before the new sequence begins, which allows perfectly smooth transitions. This Global controls which types of presets are cued up.
Note: the sequence does not finish playing when you switch to a 2-Step, 1-Step, or Different Whammy Settings preset
| Option | Action |
| ALWAYS | Loops are always cued up |
| NEVER | Loops are never cued up |
| MIDI | MIDI Clock presets are cued |
| TAP-ALL | |
| TAP-OLD | Only Tap Tempo and One-Shot presets that use "old" tempo are cued |
The Cue Loop default setting is ALWAYS.
DUMP PGM
G-Quencer preset data can be stored on a computer in MIDI SYSEX format for later use, or copied to another G-Quencer.
Note: preset names are not dumped, only preset data
GQ dumps SYSEX data in batches of 6 presets:
001-006 .:. 007-012 .:. 013-018 .:. 019-024 .:. 025-030 .:. 031-036 .:. 037-042 .:. 043-048 .:. 049-054 .:. 055-060 .:. 061-066 .:.
067-072
073-078 .:. 079-084 .:. 085-090 .:. 091-096 .:. 097-102 .:. 103-108 .:. 109-114 .:. 115-120 .:. 121-126 .:. 127-128 .:. GLOBALS .:. ALL DATA
Connect G-Quencer's OUT Jack to the MIDI IN jack on the receiving device.
Select the range of presets you wish to dump, and press the START Button. When the preset data has been sent, the Display will say SENT PGM [Preset Range].
Note: if you choose ALL DATA, there will be a 2 second delay between batch data dumps. Be patient.
Storing Presets Externally
To capture G-Quencer MIDI SYSEX data on a computer, we suggest MIDI-OX for Windows, and SysEx Librarian for Mac.
MIDI-OX Instructions (Windows)
1) Install MIDI-OX and make sure that you have the appropriate MIDI connection between G-Quencer and your PC.
2) Launch MIDI-OX and choose View Menu > Sysex
3) In the Sysex window, choose Sysex > Receive Manual Dump.
4) When the dump is completed, press Done, then choose Display Window > Save as... to store the data on your computer.
SysEx Librarian Instructions (Mac)
1) Install SysEx Librarian and make sure that you have the appropriate MIDI connection between the unit and the Mac.
2) Launch SysEx Librarian.
3) Select your MIDI interface in the dropdown menu at the top (if it's not already selected)
4) Click "Record Many"
5) When the dump is completed, double-click the newly created file in the window and name it. The file is automatically been saved to your home directory (under /Users/<your name>/Documents/SysEx Librarian/ ).
Loading External Presets
Connect G-Quencer's IN Jack to the MIDI OUT jack of the device sending the preset data.
Note: this can be a computer or another G-Quencer
Note: G-Quencer's Whammy Version must be the same as the Whammy Version encoded in the preset data. If they are not the same, G-Quencer will display WRONG WHAMMY and no data is written. Here's how to change your Whammy Version.
After each data batch is successfully received, G-Quencer will display RCVD.PGM [Preset Range]
Note: External Presets cannot be loaded if the receiving G-Quencer is in Globals mode
Loading From Another G-Quencer
1) Connect the OUT Jack of the sending device to the IN Jack of the receiving device.
2) Using the Global DUMP PGM, make the sending G-Quencer dump its preset data to the receiving G-Quencer.
MIDI-OX Instructions (Windows)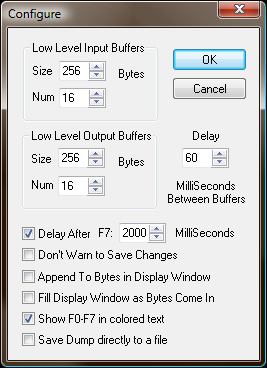
1) Load the presets file into your MIDI SYSEX program, such as MIDI-OX for Windows.
2) Launch MIDI-OX and choose View > Sysex
3) Configure MIDI-OX to pause 2 seconds between data batch sends as follows:
Choose: View Menu > SysEx… > Sysex > Configure…
Set Low Level Output Buffers - Size 256 Bytes - Num 16
[check box] Delay After F7: 2000 MilliSeconds
4) In the Sysex window, choose Command > Window > Load File and navigate the location where the presets data file is stored.
5) Choose Command Window > Send Sysex.
SysEx Librarian Instructions (Mac)
1) Load the presets file into your MIDI SYSEX program, such as SysEx Librarian for Mac.
2) Launch SysEx Librarian and select your MIDI interface in the dropdown menu at the top (if it's not already selected) .
3) Configure SysEx Librarian to pause 2 seconds between data batch sends.
4) Drag the MIDI SYSEX file from the Finder into the frame of SysEx Librarian (if it's not already in there).
5) Select the file with the mouse.
6) Click Play.
Restoring Factory Settings
To restore G-Quencer's factory default settings and presets, you need a computer, compatible MIDI interface, and a program that can send MIDI SysEx data.
1) Set your G-Quencer Whammy Version to Bass Whammy.
Note:
if Bass Whammy is not selected, G-Quencer will display WRONG WHAMMY and no data is written. Here's how to change your Whammy Version.
2) Download this G-Quencer Factory Default Presets Data SYSEX file and save it on your computer.
3) If you also want to restore the original 32 preset names, download this G-Quencer Factory Default 1-32 Preset Names SYSEX file and save it on your computer.
4) Follow the instructions for Loading External Presets.
After you have restored the factory settings and G-Quencer is re-started, you will be asked to select your Whammy type, as described above. Once selected, the initial 32 factory presets will be re-installed, and you will need to go through the Initial Setup.
Table of Displayed Whammy Settings
The names displayed for the Whammy settings will differ depending on which version you use.
For all settings, two [+] signs after the setting name means the Whammy is On, while two minus [-] signs means the Whammy is Bypassed. For example, +OCT ++ means Octave Up, Whammy On, while +OCT -- means Octave Up, Whammy Off.
Note: the setting is also sent to the Whammy so it can be previewed in real time
Whammy 4
| SHAL | Shallow Detune |
| DEEP | Deep Detune |
| +2.OCT | 2 Octaves Up Pitch Shift |
| +OCT | Octave Up Pitch Shift |
| -OCT | Octave Down Pitch Shift |
| -2.OCT | 2 Octaves Down Pitch Shift |
| DIVE | Dive Bomb (3 Octave Down Pitch Shift) |
| DROP | Drop Tune (whole step Down Pitch Shift) |
| +2+3 | 2nd Up > 3rd Up Harmony |
| F3+3 | Flat 3rd Up > 3rd Up Harmony |
| +3+4 | 3rd Up > 4th Up Harmony |
| +4+5 | 4th Up > 5th Up Harmony |
| +5+6 | 5th Up > 6th Up Harmony |
| +5+7 | 5th Up > Flat 7th Up Harmony |
| -4-3 | 4th Down > 3rd Down Harmony |
| -5-4 | 5th Down > 4th Down Harmony |
| -8+8 | Octave Down > Octave Up Harmony |
Whammy 5 & DT
| +2.OCT | 2 Octaves Up Pitch Shift |
| +OCT | Octave Up Pitch Shift |
| +5TH | 5th Up Pitch Shift |
| +4TH | 4th Up Pitch Shift |
| -2ND | 2nd Down Pitch Shift (whole step) |
| -4TH | 4th Down Pitch Shift |
| -5TH | 5th Down Pitch Shift |
| -OCT | Octave Down Pitch Shift |
| -2.OCT | 2 Octaves Down Pitch Shift |
| DIVE | Dive Bomb (3 Octave Down Pitch Shift) |
| DEEP | Deep Detune |
| SHAL | Shallow Detune |
| +2+3 | 2nd Up > 3rd Up Harmony |
| F3+3 | Flat 3rd Up > 3rd Up Harmony |
| +3+4 | 3rd Up > 4th Up Harmony |
| +4+5 | 4th Up > 5th Up Harmony |
| +5+6 | 5th Up > 6th Up Harmony |
| +5+7 | 5th Up > Flat 7th Up Harmony |
| -4-3 | 4th Down > 3rd Down Harmony |
| -5-4 | 5th Down > 4th Down Harmony |
| -8+8 | Octave Down > Octave Up Harmony |
Bass Whammy
| +2.OCT | 2 Octaves Up Pitch Shift |
| +OCT | Octave Up Pitch Shift |
| +5TH | 5th Up Pitch Shift |
| +4TH | 4th Up Pitch Shift |
| +2ND | 2nd Up Pitch Shift |
| -2ND | 2nd Down Pitch Shift (whole step) |
| -4TH | 4th Down Pitch Shift |
| -5TH | 5th Down Pitch Shift |
| -OCT | Octave Down Pitch Shift |
| DIVE | Dive Bomb (3 Octave Down Pitch Shift) |
| DEEP | Deep Detune |
| SHAL | Shallow Detune |
| -4+3 | 4th Down > 3rd Up Harmony |
| -4+5 | 4th Down > 5th Up Harmony |
| -5+5 | 5th Down > 5th Up Harmony |
| +5+6 | 5th Up > 6th Up Harmony |
| +5+8 | 5th Up > Octave Up Harmony |
| -8-4 | Octave Down > 4th Down Harmony |
| -8+8 | Octave Down > Octave Up Harmony |
| +8+10 | Octave Up > Octave plus 2nd Up Harmony |
| +8+16 | Octave Up > 2 Octave Up Harmony |
Table of Displayed Pitch Shift and Harmony Intervals
The names displayed for the Whammy intervals are the same for all Whammy versions.
Pitch Shift Intervals on all Whammy versions span a 4 octave range, from 2 octaves down to 2 octaves up.
Harmony Intervals span a 2 octave range, from 1 octave down to 1 octave up, with the exception of the Bass Whammy which goes to 2 octaves up.
For all settings, the letter "P" after the Step Number indicates a Pitch interval, and an "H" indicates a Harmony interval.
| +2.OCTAVE | two octaves up | +24 half steps |
| +OCT+MA7 | one octave plus major 7th up | +23 half steps |
| +OCT+FL7 | one octave plus flat 7th up | +22 half steps |
| +OCT+6TH | one octave plus 6th up | +21 half steps |
| +OCT+FL6 | one octave plus flat 6th up | +20 half steps |
| +OCT+5TH | one octave plus 5th up | +19 half steps |
| +OCT+FL5 | one octave plus flat 5th up | +18 half steps |
| +OCT+4TH | one octave plus 4th up | +17 half steps |
| +OCT+3RD | one octave plus 3rd up | +16 half steps |
| +OCT+FL3 | one octave plus flat 3rd up | +15 half steps |
| +OCT+2ND | one octave plus 2nd up | +14 half steps |
| +OCT+FL2 | one octave plus flat 2nd up | +13 half steps |
| +OCTAVE | one octave up | +12 half steps |
| +MAJ 7 | major 7th up | +11 half steps |
| +FLAT 7 | flat 7th up | +10 half steps |
| +6TH | 6th up | +9 half steps |
| +FLAT 6 | flat 6th up | +8 half steps |
| +5TH | 5th up | +7 half steps |
| +FLAT 5 | flat 5th up | +6 half steps |
| +4TH | 4th up | +5 half steps |
| +3RD | 3rd up | +4 half steps |
| +FLAT 3 | flat 3rd up | +3 half steps |
| +2ND | 2nd up | +2 half steps |
| +FLAT 2 | flatted 2nd up | +1 half step |
| UNISON | pitch unchanged | |
| -FLAT 2 | flatted 2nd down | -1 half step |
| -2ND | 2nd down | -2 half steps |
| -FLAT 3 | flat 3rd down | -3 half steps |
| -3RD | 3rd down | -4 half steps |
| -4TH | 4th down | -5 half steps |
| -FLAT 5 | flat 5th down | -6 half steps |
| -5TH | 5th down | -7 half steps |
| -FLAT 6 | flat 6th down | -8 half steps |
| -6TH | 6th down | -9 half steps |
| -FLAT 7 | flat 7th down | -10 half steps |
| -MAJ 7 | major 7th down | -11 half steps |
| -OCTAVE | octave down | -12 half steps |
| -OCT-FL2 | one octave plus flat 2nd down | -13 half steps |
| -OCT-2ND | one octave plus 2nd down | -14 half steps |
| -OCT-FL3 | one octave plus flat 3rd down | -15 half steps |
| -OCT-3RD | one octave plus 3rd down | -16 half steps |
| -OCT-4TH | one octave plus 4th down | -17 half steps |
| OCT-FL5 | one octave plus flat 5th down | -18 half steps |
| -OCT-5TH | one octave plus 5th down | -19 half steps |
| -OCT-FL6 | one octave plus flat 6th down | -20 half steps |
| -OCT-6TH | one octave plus 6th down | -21 half steps |
| -OCT-FL7 | one octave plus flat 7th dowm | -22 half steps |
| -OCT-MA7 | one octave plus major 7th down | -23 half steps |
| -2.OCTAVE | two octaves down | -24 half steps |
Tips and Tricks
When playing back sequences, keep the Whammy's expression pedal in the Toe Down, Heel Up position to minimize tracking errors. This is particularly true with the Whammy 4.
Whammy 4 pitch changes are far more abrupt .:. a more techno sound than the other 3 versions. This is particularly true on pitch shifts where the intervals move outside a single octave (when the Whammy changes settings). Faster looping tempos amplify this effect.
If you are using G-Quencer with an external MIDI controller, GQ can be a convenient pedalboard display. Even if you are not using a particular MIDI Program Change number to engage GQ, name the preset and create a Different Whammy Settings type preset with the Whammy bypassed.
Play a riff against the looping layer of shifting pitches and hear sounds you never thought possible.
Synchronize two G-Quencers using MIDI Clock and slightly different sequences, then run the Whammy outputs in stereo and pan them hard left and right.
Here's a song that uses G-Quencer in a variety of ways, from creating harmonic and melodic lines to "sweetening the mix" with GQ ear candy:
Stellar .:. Featuring G-Quencer, the Riff Dispenser
Specifications
Power Requirements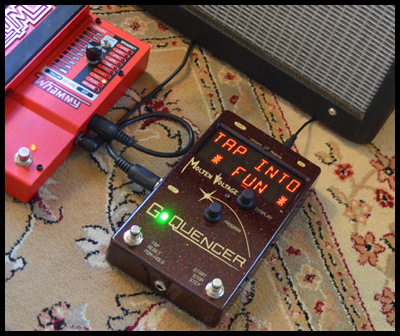
G-Quencer is powered by standard "BOSS" type 9-volt DC, 2.1mm, 300mA min., tip negative power supply (sold separately). Current draw ~ 250mA
MIDI Phantom Power
G-Quencer neither uses nor passes through MIDI Phantom Power.
MIDI Running Status
G-Quencer does respond to MIDI data received in the Running Status format.
G-Quencer Dimensions
7.8" (199mm) Wide x 4.8" (122mm) Deep x 2.3" (59mm) Tall
GQ Side Controller Dimensions
4.5" (115mm) Wide x 2.5" (64mm) Deep x 1.9" (49mm) Tall
.:.
Road-ready MIDI Machinery™, hand built in Oregon, USA by Molten Voltage.
Related Products
Use Molten Voltage Master Control to randomly access G-Quencer presets, start and stop sequences, and to synchronize GQ to MIDI Clock, along with over 100 other effects.
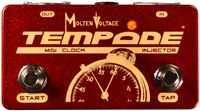
Use Molten Voltage Tempode to start and stop sequences and synchronize G-Quencer to MIDI Clock.
Digitech and Whammy are trademarks of the Harmon Music Group Inc. which is unrelated to Molten Voltage.
© 2015, Molten Voltage. Patents Pending. All Rights Reserved.